What is a polarizing filter? When is it worthwhile? What should I look for when buying? Here comes my ultimate guide to polarizing filters!
The article is divided into 4 parts. At the beginning I give concrete recommendations and report on my experiences. The second part is about what a polarizing filter is and in which situations it is useful for you. Part three is about what you should consider when buying a polarizing filter. In part four you will find the frequently asked questions about these filters. Part five concludes with how to use polarizing filters.
Contents
Polarizing filter review & comparison – which is the best polarizing filter?
Over the last 15 years I have used a wide variety of polarizing filters. I started with Hama, then I had a Hoya and for my wide angle a B&W. I sorted my polarizing filter review by budget, with the Hoya HD having the best price/performance ratio for me.
Beginners – Small budget
For your first polarizing filter, you can use Hama. As far as I know, Hama doesn’t manufacture filters themselves, but buys from other manufacturers and then labels the filters. So you can never tell exactly which manufacturer the filter is really from. But it can also be a Hoya filter behind it.
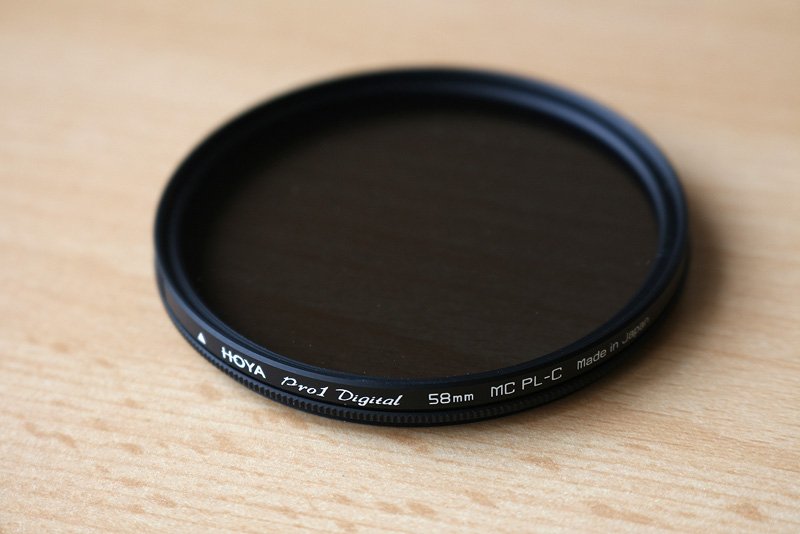
Advanced – Medium Budget
The filters from Hoya offer a good price-performance ratio. My recommendation here is the Hoya HD polarizing filter.
Professional – Big budget
If you are looking for a polarizing filter that delivers maximum quality, you will find it at B+W. In my experience, the strength of the polarization is no different than the Hoyas. However, according to the experiences of other photographers, the filters are even more robustly constructed.
Why I advise against cheap filters
Some photographers spend 800 Euros on a good lens and then save on the polarizing filter by buying one for 10 Euros. The problem is: the light has to pass through this filter on its way to the sensor. If you buy a bad filter, it can have a negative effect on your image quality. Then all the money spent on the sharp lens will not have been worth it. So it makes little sense to save money at the wrong end.
What is a polarizing filter and what does it do?
A polarizing filter is a filter used in photography to polarize light. It is used to remove reflections from non-metallic surfaces.
Polarizing filter is an abbreviated spelling of polarizing filter.
How does a polarizing filter work?
Light naturally vibrates in three dimensions. Light rays are emitted from a light source, reflected from other objects, and also absorbed by some surfaces. So when light rays move through space, they vibrate three-dimensionally. A polarizing filter ensures that light does not oscillate in several planes. It transforms it so that it only vibrates on one plane. The colleagues at www.3d-brillen.de have thankfully created a nice graphic about this.
Before the light hits the polarizing filter it vibrates in all possible planes, after filtering it vibrates only in one plane. Each polarizing filter can be rotated to adjust the direction and degree of polarization.
What is the difference with and without filters?
In the following example images you can see the effect with and without filter.
Example 1
Example 1 shows a slightly cloudy sky, where blue sky can still be seen behind the clouds. With the polarizing filter, this blue appears much darker and in a different shade of blue.
Example 2
In this image, I used the polarizing filter to darken the sky and enhance the colors throughout the image. Because the filter reduces reflections, the grain and poppies appear much clearer. Any reflections of the sky on these foreground elements are reduced.
It may seem strange to you that I’m talking about reflections on plants here. Stand at eye level in front of a leaf, for example on a tree. If you now hold your hand over this leaf, it becomes a little darker because less light falls on it from above. In addition, however, everything that is around the leaf is reflected on it. At the moment when you hold your hand over the leaf, you can observe how the reflection of the sky decreases.
Back to the example image 2: The polarizing filter reduces reflections on non-metallic surfaces. That’s exactly what it does here on the grain and the poppies.
Example 3
The third example shows a motif from the Ilse Valley in the Harz Mountains. Here the reflections of the sky on the water surface and on the plants are wonderfully removed, resulting in stronger colors and more details in the water. Bright areas in the water that are otherwise too bright are dimmed a bit in the process. Fog is also very slightly reduced.
Want to get regular new tips about photography? Then this way.
In these situations a polarizing filter is useful
Enhancing colors in landscape photography
A typical problem in landscape photography: Especially on cloudy days, the different shades of green in nature often look very similar. With a polarizing filter you can create bright colors here.
What is the reason for this? The sky is also reflected on the leaves. The surface is not as reflective as water, for example, but the white of the sky is also reflected here. As a result, the green tones are not as strong as on a sunny day. So by using a polarizing filter you can remove the reflections and create very color-intensive images.
This effect can be used in almost all areas of nature photography. Depending on the light situation, haze or fog can also be softened with a polarizing filter, as shown in the example above.
Enhance the blue of the sky
If your subject is at a 90° angle to the sun, then you can use a polarizing filter to significantly enhance the blue of the sky. In combination with the last point, such great colors can only be achieved with the help of this filter.
Making a rainbow more clearly visible
Maybe you will have the rare opportunity to photograph a rainbow. By the way, it only occurs when there is rain and the sun shines on the rain. Then the rainbow can be seen opposite the sun.
If you set the polarizing filter to maximum efficiency during a rainbow, the rainbow disappears. This is because these color lines are polarized light themselves. Therefore I recommend not to use the full efficiency, but a little less. Then the sky in the background can be darkened, while the rainbow in the photo stands out nicely.
Removing reflections on glasses
If your model is wearing glasses for a portrait shoot, you usually still want to be able to capture the eyes well in the image. You can use a polarizing filter to remove reflections of the environment on the glasses.
Photographing through the water surface
For example, if you want to take a picture of the fish in a pond in a park, the surface of the water often reflects the sky. So the fish are hardly visible on the photo. With a polarizing filter you can almost completely eliminate the reflections of the sky on the water surface, so that you get the fish much better on the picture. Of course it doesn’t always have to be fish, rocks or water plants can also be of interest.
When I mainly use the polarizing filter
I often use this filter when shooting in river valleys on a cloudy day. Three effects occur here:
The colors of the surrounding trees become much richer because the reflection of the sky on the leaves disappears.
The reflections on the water surface disappear and the water appears darker.
Because the filter absorbs light, the exposure time increases. So I can often expose the river longer without an ND filter, which simplifies the structures in the water and creates a surreal effect through longer exposure.
Can you create a polarizing filter in post processing?
The polarizing filter is one of the few filters that cannot be created in post processing. There is a physical principle behind it, as explained above, which cannot be replaced by Photoshop. Therefore, for me, this filter is one of the filters that I will always use, along with the ND filter and infrared filter.
Buying a polarizing filter
What do you have to consider if you want to buy a polarizing filter?
The first thing you need to know is which of your lenses you want to use the polarizing filter with. Often your standard zoom, for example the 18-55mm, comes into question. Here you can read on the lens or in the lens description which filter diameter your lens has.
Common sizes are 49mm, 52mm, 58mm, 62mm, 67mm, 72mm, 77mm and 82mm. Then you need a polarizing filter in exactly that size. For the polarizing filters I recommend below, you can usually select the size again on the sales page.
Tip: Use filters with different lenses
If you have multiple lenses that you want to use your filters with, then your lenses often have different filter diameters. You can buy a separate filter for each lens. Alternatively, you can work with a step-up ring. You should buy the filter for the lens with the largest filter diameter. With the step-up ring you then have an adapter between the different filter thread diameters. A step-up ring often costs only a fraction of a new filter.
This tip applies in principle to all filters in photography, such as ND filters or gray graduated filters. If I had been aware of this back when I started my photography, I would have saved up for 77mm filters right away and bought only this one. For my lenses with smaller filter diameters, I would have then used step-up rings. So I had a polarizing filter for 58mm, one for 52mm, one for 49mm and one for 67mm. That meant extra cost that I could have saved with step-up rings.
Polarizing filters are available from a wide variety of manufacturers, for example Hoya, B&W, Hama, Heliopan, Haida, Lee, Cokin, Zeiss, Käsemann and Rodenstock. Below is a comparison of which polarizing filters I have already used and which of them I would recommend.
What is the difference between linear and circular?
I could explain the physical background to this now, but actually you just need to know: For analog photography you can use both variants, for digital photography you have to use a circular polarizing filter.
Screw-in and plug-in filters
Like many other filters in photography, polarizing filters are available as screw-on or plug-in filters. Plug-in filter systems are especially common for gray graduated filters, as they should be adjustable in height. For such systems as from Cokin, Hitech or Lee, there are polarizing filters that are placed in the filter holder and can then be rotated.
When it comes to polarizing filters, I am a fan of screw-in filters. I rarely use plug-in filters in my photography. With a poorly sealed plug-in filter system, light can fall on the filters from the outside, which then shows up in the images in flat contrasts or light leaks during long exposures. This cannot happen with screw-in filters.
Polarizing filters for a Canon, Nikon, Sony or Fujifilm camera – do I have to pay attention to anything in particular?
You can buy a polarizing filter regardless of the manufacturer of your camera. So it doesn’t matter if you use Canon, Nikon, Sony, Fujifilm, Pentax or Olympus.
Frequently asked questions
How much light does this filter block?
A polarizing filter lets less light through to the sensor due to its function. As a rule of thumb, it swallows about two stops of light. This can be a disadvantage, because depending on the light situation you then have to work with the tripod or increase your ISO. On the other hand, it can also be an advantage if the subject perhaps comes into its own better with a slightly longer exposure.
Can I use a polarizing filter on all lenses?
In principle, there is no restriction here. You can use polarizing filters on all lenses that have a filter thread. Below I describe why I use the filter on a wide-angle lens only in certain situations.
Can I always leave a polarizing filter on the lens?
Newsletter Lead 4 – Photo EquipmentYes you can, but I would not recommend it. As described above, the polarizing filter absorbs light. So your image will be darkened, resulting in longer exposure times. The effect of this filter is also not desirable in all situations. Therefore I recommend to use this filter only if you really need it.
Combining two polarizing filters like an ND filter
In principle, it is possible to combine two polarizing filters to create a variable ND filter. You just have to make sure that the front filter is a linear polarizing filter, while the back filter is a circular polarizing filter. Only then can the autofocus of an SLR camera still work. There is an interesting article about this at Docma.
When you should not use polarizing filters with wide-angle lenses
As mentioned above, the filter darkens blue skies even further. This behavior works best at a 90 degree angle to the sun. With a wide angle lens you have a large angle of view on your photos. So it can happen that a part of the sky is darkened by the polarizing filter, while the remaining part appears normal. This looks very unnatural.
That’s why I never use the polarizing filter on the wide angle to darken the blue sky. For that, I use gray graduated filters or make multiple exposures that I then compose in post-processing. More info on how I post-process my landscape photos can be found here.
Polarizing Filter Application
Photographing with a polarizing filter – How to use the filter optimally
Depending on the position of the light, a polarizing filter always has a range in which it has a particularly strong effect. If you want a dark blue sky, then your subject should be at an angle of 90 degrees to the sun.
This means, for example, that at sunset the sun should be to your left or right. Then you have side light on your subject and can use a polarizing filter to optimally darken the sky behind it.
The 90 degree rule also applies when the sun is directly above you at noon. Then you have the strongest polarization at the horizon.
Polarizing filters also work at other angles, but not nearly as strongly. For example, if you shoot against the sun or with the sun behind you, you will get almost no effect with this filter.
Every polarizing filter can be rotated. By rotating it, you can adjust the intensity and direction. I recommend that you base the intensity on your image. Think about the mood you want to create. If you always turn the filter to maximum effect, you’ll have crisp, intense colors. But does that suit your image? Or would you rather create softer pastel colors because that’s more in line with the image mood you want to capture?
Filter too tight? – This is how you loosen it again
Especially with a polarizing filter, it can happen that you screw it on too tightly and then it can no longer be removed from the lens. I recommend to try it with your fingertip and not to tighten it too much. If that doesn’t work, then there is this helpful tool.
How to clean your polarizing filter
To avoid damaging the surface of your filter, you should not use chemicals when cleaning it. I recommend a soft microfiber cloth. Hama offers the Lenspen, which is also good to use. I was able to remove stubborn fingerprints well with Hama optic paper. For really rough dirt, a damp cloth without soap should be a good choice. You can find out how I clean my filters and lenses here.
Do you know now if you need a polarizing filter or not? Do you have any questions? What are your experiences with this filter? Write me in the comments! You can also leave your email if you don’t want to miss any more posts from me.