Looking for new lenses for the Sony a6000? Here are my current recommendations for all Sony APS-C cameras with E-mount, including Sony a6400 and a6600!
Contents
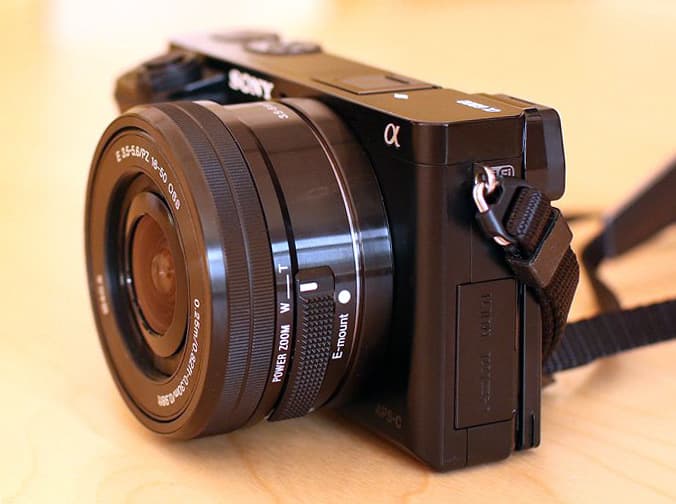
The Sony a6000 is an extremely popular camera. It is small, light and delivers good image quality. The 16-50 mm kit lens covers a lot of applications. But what if you now want to slowly move up a notch?
My personal recommendations: Sony a6000 lenses
Below I give my personal recommendations for a suitable lens for the Sony a6000, 6100, 6300, 6400, 6400 and 6600 for specific subjects. I update the list regularly.
I have tried to primarily include lenses with a good price-performance ratio in my list. This succeeds in most cases, but for some more specialized applications the price is a bit higher.
I’ve organized the lenses by application, depending on what your photographic subjects are.
A better standard zoom: Sony E 16-70 mm F4 ZA OSS
The kit lens on the a6000, the Sony E PZ 16-50 mm F3.5-5.6 OSS, is pleasantly small and lightweight. However, during my Sony a6000 test, I wasn’t as thrilled with the sharpness, especially towards the edges. Therefore, I would recommend the Sony E 16-70 mm F4 ZA OSS as a first upgrade.
It brings a wider focal length range, is faster and, most importantly, sharper. Like the 16-50 mm, it also has an image stabilizer with the OSS. With 16-70 mm zoom range, it is a good all-around lens for the Sony a6000 cameras.
If you buy this lens, then you should test the sharpness right after delivery. As can also be read in the Amazon reviews, the series dispersion is probably a bit more pronounced. This means that there are specimens that are not really sharp. In this case, you should of course make use of the exchange right.
Another alternative and also a good all-rounder is the Sony E 18-135mm F3.5-5.6 OSS. The zoom range here is already very large, but the image quality is still very okay for it according to various tests. From what I’ve read so far, it seems to be better than the 18-105 F4 G. So the extra cost is worth it. My girlfriend has been using this lens for 2 years and is very happy with it.
Also, the Sony SEL 1655G has recently become available, and so far it’s coming off very well in the tests. It brings it a continuous speed of 2.8.
A telephoto lens for more distant subjects: Sony E 55-210 mm F4.5-6.3 OSS
If you occasionally shoot more distant subjects, then the Sony E 55-210 mm F4.5-6.3 OSS is a good choice. It’s quite affordable for a decent telephoto lens and also has an image stabilizer.
A telephoto lens is also a good way to change your field of view and capture completely different image compositions. In landscape photography, it is particularly appealing to take photos from elevated positions looking down on fog. In this way, a photo can be built up through countless layers in the image.
With this telephoto lens, you can also take your first steps in sports and wildlife photography.
A wide angle for landscape and architecture: Sony E 10-18 mm F4 OSS
I use a wide-angle lens 95% of the time for my landscape shots. It can create an incredible amount of depth in the image.
My recommendation here is the Sony E 10-18 mm F4 OSS. It brings a consistent speed of F4. The OSS is not quite as interesting for landscape and architecture, because here many shots are taken from a tripod anyway. The Sony 10-18mm has good sharpness and a small zoom range, but it’s just right for many landscape shots.
If this lens is too high for you in terms of budget, then there is another alternative: the Samyang 12mm F2.0. It is a fixed focal length with manual focus and with aperture 2.0 decently fast. The 12mm Samyang enjoys very good reviews on Amazon. A friend of mine also uses it and is very happy with it. So if you’re comfortable with manual focus, it’s worth a look.
A lightweight fixed focal length for portraits: Sony E 50 mm F1.8 OSS
Fortunately, there is an affordable and good fixed focal length for portraits for the Sony E-mount connection. But the highlight is yet to come: it even has an image stabilizer with OSS.
The Sony E 50 mm F1.8 OSS has a fixed focal length of 50 mm and is also pleasantly fast with an aperture of 1.8. If you want to specialize more in portraiture, this is exactly the compact lens I recommend.
A macro lens for insects and plants: Sigma 70mm F2.8 DG Macro Art
It’s not that easy to find a macro lens for a Sony a6000. Although there is a 90mm macro in Sony’s own range, this is not exactly cheap at almost €1000.
I therefore recommend the Sigma 70mm F2.8 DG Macro Art, because it not only costs half as much, but delivers similar good image quality. With an aperture of 2.8 it is sufficiently fast and at 70mm not all insects flee immediately, because you don’t have to get quite so close to them. This is also the reason why I don’t recommend the Sony macros with 50 mm and 30 mm for insects. Unlike the 90 mm 2.8 Sony macro lens, however, it doesn’t have an image stabilizer.
A macro lens expands your photographic world especially, because a new microcosm opens up that wants to be discovered.
A fast fixed focal length as an all-rounder: Sony E 35 mm F1.8 OSS
Do you want to develop your photography and train your eye for image composition? Then a fixed focal length is a good idea. Here, I recommend taking a medium focal length that is not too telephoto or wide-angle-heavy. For the Sony Alpha cameras a6000, a6300, a6400, a6500 and 6600 this is around 30 mm.
Again, fortunately, there is a good fixed focal length with suitable speed that has OSS to boot and is quite compact. Let me say as a Canon user: you Sony users have it good. The Sony E 35 mm F1.8 OSS is an excellent choice that is then affordable.
A lens for northern lights, starry skies and night photography: Sigma 19mm F2.8 DN Art
In a sense, a combination of several features is important for northern lights. On the one hand, you want to have a fairly wide-angle lens to still have some of the landscape under the Northern Lights in the image. On the other hand, since the northern lights are known to move, the lens should have the largest possible aperture. Here usually only fast fixed focal lengths come into question. The same applies to images of the night sky, since the Earth continues to rotate during the exposure. Here, too, a maximum exposure time of 15 seconds is advisable.
Although there is a 16 mm and a 20 mm lens with a speed of 2.8 directly from Sony, these lenses are not particularly sharp to the edges or distort more than usual. Instead, I recommend the Sigma 19mm F2.8 DN Art. It also offers a starting aperture of 2.8, so it’s definitely suitable for northern lights. Again, the good news is that this lens is exceedingly good value for money.
Another alternative is the Samyang 12mm mentioned above. It is even wider-angle with an aperture of 2.0 even faster. However, since it doesn’t offer autofocus, you’ll have to focus manually with it. It costs a little more than the Sigma, but is still very affordable for a lens of this quality.
No matter which lens you take: You’ll definitely need a tripod for Northern Lights, as exposure times are usually between 15 and 30 seconds.
A lens for safari: Sony 100-400 mm F4.5-5.6 OSS
It is not easy to recommend a good and affordable lens for safaris. The 70-210 mm mentioned above is often not enough because the animals are further away.
However, the Sony 70-350 mm G F4.5-6.3 OSS is recommended. This allows you to „zoom in“ closer to the animals. It brings an image stabilizer so you can shoot without a tripod without shaking. It’s not cheap, but the sharpness is very good. In this respect, it is actually the only lens that is recommended for a safari and still remains reasonably within the price range.
If you plan to go on safaris more often, then Sony 100-400 mm F4.5-5.6 OSS can be a good option for you. However, it no longer falls under lenses for beginners in terms of price, as it is significantly more expensive than the 70-350 mm.
About me
I have been photographing primarily landscape and architecture for more than 15 years. During this time I have used many different cameras and lenses. Therefore, I can assess which lens is useful for which type of photography. My girlfriend uses a Sony a6000 and often asks me about lenses, so I’m always up to date here.
What should you look for when buying lenses?
Maybe you are not familiar with all the terms and features around lenses. That’s why I’ll give you a short overview of what you should look out for.
The right lens mount for your Sony a6000 lenses: Sony E-Mount
Not every lens fits every camera. The camera mount of your Sony a6000 for the lens is called Sony E-Mount. This is exactly what you have to pay attention to when buying new lenses. The Sony E-Mount lens mount is also used by the a6100, a6300, a6400, a6500 and a6600. My recommendations below are of course all suitable for these cameras. An overview of the differences between the cameras of the Sony a6000 series can be found here.
You can use Sony E-mount lenses on different system cameras. The cameras can have different sensor sizes. Among others, there are APS-C and full-frame sensors. For example, the Sony a6000 is a camera with an APS-C sensor, just like all the other mirrorless system cameras from the list above.
The APS-C sensor is smaller than a full-frame sensor. So you can’t use E-mount lenses for an APS-C sensor on a full-frame camera, because you’ll get dark corners because the image circle is not large enough. On the other hand, you can use full-frame lenses on APS-C cameras.
If you are already planning to buy a Sony full-frame camera someday, my recommendations for Sony a7 lenses might also help you.
What does focal length actually mean?
In simple terms, the focal length indicates which image section the lens sees. For example, a Samsung Galaxy S7 has about a 16 mm lens when compared to the focal length of your Sony a6000. So the image detail is the same as when you shoot with your current 16-50mm kit lens at 16mm focal length.
If you want to „zoom in“ further because your subject is far away, then you need a focal length greater than the 50 mm of your current 16-50 mm. For example, 200 mm. Lenses in this range are called telephoto lenses.
If, on the other hand, you want to „zoom out“ further, then the focal length of the new lens should be less than 16 mm. So an example of this would be 10 mm. Such a lens is called a wide-angle lens.
Do not use soup zooms: Maximum 4x zoom
Now, there are lenses that cover a focal length range of 18-200 mm, for example. At first glance, this sounds tempting because you only have to take one lens with you. In addition, you don’t have to constantly switch between several lenses.
The problem with this is that when you zoom with one lens, multiple lenses shift within the lens. So the construction of a zoom lens is much more complex than if the lens only has a fixed focal length. This was also the reason why there were no zoom lenses in the past. Further down I will explain the difference between zoom lenses and fixed focal length lenses.
Technology has advanced greatly in the meantime, but the optical laws of physics still limit the image quality of zoom lenses. It is not possible to make zoom lenses with consistently good image quality that have a zoom range greater than 4.
Let’s take your 16-50 mm lens as an example. The initial focal length is 16 mm, and the final focal length is 50 mm. The final focal length should be no more than four times the initial focal length. 16 mm times 4 is 64 mm. The final focal length is less than that, so the focal length of the zoom lens promises reasonable image quality.
Calculated the other way around, you can divide the final focal length by the initial focal length and the result should be less than 4. 50 mm / 16 mm = 3.125.
What about an 18-200 mm? 200 mm / 18 mm = 11.11. So here we are talking about an 11x zoom. Such lenses are disparagingly called soup zooms because the image quality is not the best (the sharpness of the image is more like soup).
Surely you bought your Sony a6000 also because you want to achieve a better image quality with your photos than with a compact camera or with a cell phone. Especially in terms of price and performance, it is one of the best system cameras anyway. In this respect, I advise you not to use the soup zooms and recommend that you rather use two or three lenses.
More tips for better image quality can be found here.
Image stabilizer is usually useful
When buying a lens, the image stabilizer is worthwhile in many cases. If you shoot in the evening or indoors with less light, then it can happen that the picture blurs. Of course, you can also turn up the ISO, but then again the image quality decreases. With an image stabilizer, you can shoot in lower light without having to use a tripod.
A rule of thumb for advanced photographers: you can handhold an exposure of 1 / focal length without blurring. An image stabilizer allows you to shoot about three stops less and still get a sharp image.
On Sony lenses, the image stabilizer can be recognized by the OSS designation in the name. OSS stands for Optical Steady Shot.
Among the Sony a6000 series, there are also some cameras that have an OSS image stabilizer built into the camera body. In this case, you can use the camera’s stabilizer and that of the E-mount lens at the same time. This allows you to handhold even longer exposure times.
Get more image quality out of your photo equipment without having to buy a new camera and lenses!
Luminous intensity – depending on the subject
In very simplified terms, the speed means how much light passes through the lens into the camera. If you currently have the Sony 16-50 mm, it means that this lens has a speed of 3.5-5.6. At 16 mm, the speed is 3.5, and at 50 mm, it’s 5.6.
For the sake of simplicity, I will only consider the final focal length of 50 mm in my example. As I said, the speed here is 5.6. Another lens with the same focal length of 50 mm, but with a speed of 1.8 has a much larger aperture. So it also lets more light into the camera.
This allows you to shoot in less light without blurring. The smaller the f-number, the faster the lens.
Another effect of more light intensity: The background of your photos becomes more blurred. This is especially interesting for portrait photography. The autofocus of your camera also works better with higher light intensity.
Size and weight – do you travel a lot?
Depending on the extent to which you often take your photography equipment with you on trips, size and weight can also play a role. For example, as a landscape photographer, I would prefer a wide-angle lens that is not quite as fast, but as small and light as possible.
Why is it worth considering the filter diameter?
If you plan to use certain filters on your lens, then the size of the filter thread may be of interest to you. Certainly, this point also applies primarily to landscape and architectural photographers, if you use ND filters or polarizing filters, for example. Maybe you have already bought filters for your A6000 and the 16-50 mm and want to continue using them.
In general, filters with a larger diameter than the new lens can be used with step-up adapter rings. A filter with a diameter smaller than that of the new lens would cause edge shading in the image with a corresponding adapter ring.
My strategy here is to use all the filters I need as 77 mm diameter and then adapt them with step-up rings to the lenses with smaller filter diameter.
What is the difference between zoom and fixed focal length?
Now I’ve talked a few times about zoom lenses and fixed focal lengths. But what are the differences here anyway?
A zoom lens has a variable focal length. A fixed focal length, as the name implies, is fixed to a specific focal length. This means that it cannot be used for zooming.
Zoom lenses are usually less fast than fixed focal lengths. Fixed focal lengths are usually sharper than zoom lenses.
When you use a fixed focal length, you put a lot more thought into your photography because you have to think carefully about what you put in the picture when you compose it. This leads to a more practiced eye in the medium term.
If you are interested in how to get more image quality out of your current photo equipment, my e-book will help you.
Adapters for other lenses
If you are switching from a SLR camera, you may have some lenses that you would like to continue using. There are adapters available, for example from K&F Concept. This adapter is inexpensive, but you will have to focus manually. The adapter is available for many different mounts, including Canon EF and Canon FD Mount. For more money, there is also an adapter from EF/EF-S to the a6000’s E mount that also offers autofocus. As you can read in the reviews, it works for many lenses, but not all.
I hope my recommendations help you out. With these lenses you can expand your photographic areas and specialize further. For sure you will have a lot of fun with them. If you have any questions, just drop me a line in the comments! Also, if you want, I can give you a quick shout out every time I post something new, so you won’t miss anything.