Image composition and composition in photography is a very complex subject. Even if you know the basic rules, you never stop learning in this field.
It is extremely important as a photographer to understand how the human eye and visual perception works. Today I want to share with you 10 tips that will help you achieve better results quickly.
Contents
How I tested image composition with an eye-tracking system
During my studies I dealt with usability of software in my internship semester. This topic is also called usability. For a local company I tested how often a button in an email newsletter is clicked when it has different sizes and colors. Part of this review was to invite 15 people to the usability lab, let them read the newsletter and click on it. In the process, I used an eye-tracking system to track the subjects‘ gaze.
At that time I was already taking pictures and of course I found it incredibly exciting to know how people perceive my pictures. So I extended the test period a bit. After the test subjects had read the newsletter, I showed them five more landscape photos of me. With the eye-tracking I could see exactly:
- Where the viewers look first
- How the eye moves across the picture
- At which points does the gaze linger
- Between which points the gaze jumps back and forth
- Where the viewer drifts out of the picture
- How long the viewer actually looks at the picture
Through this review, one thing I had read before became clear once again: with the right image design, you can „steer“ a viewer specifically through the image. If you know and understand these rules of perception, you can design your image quite deliberately.
Why image composition is so important
I have been able to draw many conclusions regarding image composition from the review and from conversations at exhibitions. As described above, it is a very complex subject. At the same time, for me it is one of the subjects in photography that provides the greatest leverage for better pictures.
Today I would like to give you 10 tips on how to improve your photos with a targeted image composition:
1. don’t center the main subject.
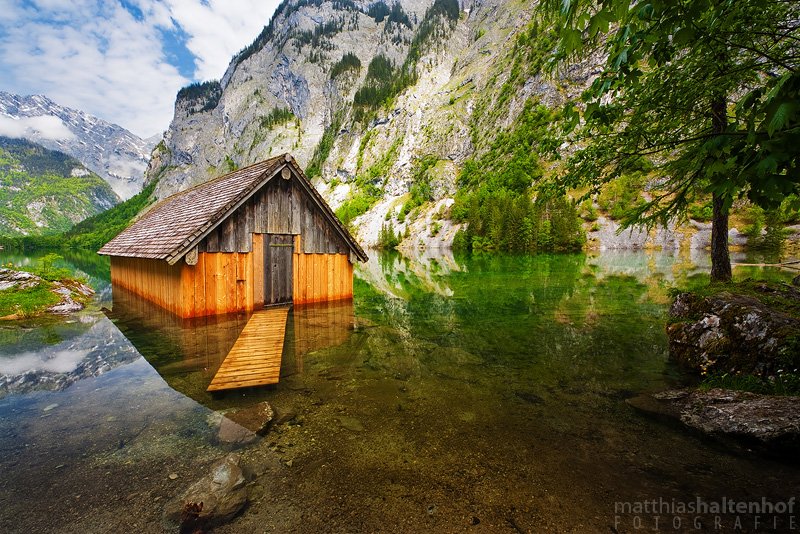
This is probably the first rule you’ve ever read if you’ve ever been into image composition. On the surface, I thought at the time: artists only do that to make their pictures look „different“. But of course, that’s not the reason. If you place your subject in the center, the picture can quickly become boring. It’s better to deliberately place your subject off-center, thereby giving the viewer a starting point for his visual journey through the image.
Where else can I place my subject? Two good basic rules are the rule of thirds and the golden ratio.
2. keep the image simple and fill it in deliberately
Many aspiring photographers make the mistake of showing too many things in the picture. Just recently, my mother showed me some vacation pictures. The pictures had good basic conditions: beautiful landscapes, beautiful subjects and beautiful light.
The problem was: there was too much on each picture.
The first thing to do was to banish the things that bother the viewer from the picture by selective image composition. Some examples:
- A hedge that was „accidentally“ in the picture
- A blade of grass that sticks out into the picture
- Garbage lying around that draws attention to itself
These are the obviously disturbing things. Now the next step is to design your picture so that it doesn’t contain too much.
How do you know when there is „too much“ in an image?
When nothing can be taken away from the elements in the image, because otherwise the image would no longer work.
It is incredibly important to design your image very consciously. Make sure that only those elements are in the picture that you want to have in it.
Think of your picture as a white canvas that you fill with elements.
If you add too many elements, it will distract the viewer. So try to build your image with as few elements as possible.
My landscape paintings are often built up from three, at most four elements.
Another tip: With long exposures, for example with an ND filter, you can smooth out the water and sky, so that your image composition becomes simpler again.
Hiddensee, National Park Vorpommersche Boddenlandschaft
Sunset on the beach of Neuendorf, Hiddensee, National Park Vorpommersche Boddenlandschaft.
Even with less depth of field it is possible to blur your background and thus simplify the image. A fast lens with the widest possible aperture will help here.
3. limit yourself to 2-3 main colors
Image composition: Complementary colors in the color wheel
Complementary colors in the color wheel, thanks to Wikimedia Commons user Golden arms
Colors consciously control our attention. Advertising posters use this control purposefully. Red, for example, catches the eye.
Colors provide certain associations. Green stands for hope and nature, blue for calm and cold, red for danger and energy.
With the variety of colors that surround us in everyday life, we are overloaded to a certain extent. It is often suggested that colorful = good. In photography, it helps to use colors in one’s pictures only very selectively. There are some black and white photographers who don’t shoot in color because there is too much information hidden in it. Like an additional layer in which you have to think.
As a basic rule you can remember: reduce your image to two or three main colors. You can take this into account when taking the picture. Also in post-processing you can selectively enhance 2 main colors while not lifting the rest.
Here, of course, it is immensely helpful to learn color theory. This way you can not only work more consciously with colors, but also specifically with complementary colors to create color contrasts. This in turn helps you to control the viewer’s attention.
4. use more wide angle for greater depth in the image
In photography, we have a fundamental problem.
We are photographing something three-dimensional: reality. In doing so, we create something two-dimensional: the photograph.
However, in order for the viewer to perceive the image intensely and vividly, we have to suggest three-dimensionality to him. Then he feels drawn into the picture: „As if I were there.“
Creating three-dimensionality in images is much easier with a wide-angle lens than with a telephoto lens. I notice this every time I shoot with focal lengths longer than 80mm. The images then look „flatter“. Often the image then consists only of areas, without conveying depth.
From time to time I get a request from someone who wants to photograph people in street scenes, which lens he should buy for this. As a suggestion in the request often comes a telephoto or an 85mm lens. With such lenses, it is difficult for the viewer of the image to get into the scene. The best street photography shots have been taken with film cameras and a 35mm lens.
Use more wide angle.
By wide angle lens, I don’t mean super wide angle. It’s perfectly fine to take your standard 18-55mm zoom and shoot more at 18mm.
The hack: fix your lens with tape at 18mm and shoot two weeks only like this. Not only will you create images with more depth, but you’ll also become more aware of your angle of view and composition. You use your feet when you need to get closer to a subject.
5. get closer for more three-dimensionality
Which is closely related to point 4: Move closer to the subject. This is again a measure to create more depth in the image.
The classic: You buy a super wide angle and shoot everything from the same height as before with your standard zoom. Namely from a standing position. The thing is, when you zoom out further, things are naturally smaller. So less of your main subject is visible. So you have to get closer. When you’re closer to the subject, the viewer of your images will also feel closer.
A positive side effect: If you get closer, you reduce the number of elements in the image (tip #2).
6. use repetitions for eye guidance
By using repetitive elements in the image, you can control perception, create patterns, and also generate more depth.
When an element in the image repeats, the viewer is already familiar with it. His eye has seen and looked at it before. If this element is then basically the same as the first, the eye can move along this repetition. If the element has a different size than the first element, it can be used to create depth in the image. Sounds all a bit theoretical, hmm?
The repetition here in the image is the rounded roofs. In the foreground, the roof is closer and therefore larger. The depth here is created partly by the lines, and partly by the repetition with different sizes.
7. create more depth with tapering lines
This is another point to create more depth in the image. With more depth, the image looks more vivid to the viewer. A very simple but very effective measure is to use tapered lines.
The first time I came across this was 11 years ago when I was photographing the rails at a railroad crossing. The rails seem to get closer and closer together as the distance increases. Of course, this is only related to the optics. This effect is stronger the wider the angle of the lens used. This can be observed in the same way with a road.
Basically, this effect can be used with all parallel lines. You just have to get close enough.
The viewer is drawn into the image by the converging lines. The eye likes to move along the converging lines.
8. consciously use portrait and landscape format
We make the most fundamental decision about image composition the moment we choose portrait or landscape format. Of course, there are subjects for which there is a reason why they are photographed more in one of the two formats. They are naturally made for that. Which format you use is actually one of the first issues for conscious image design.
It’s not for nothing that portrait format is also called portrait format and landscape format is also called landscape format.
But what does the viewer associate with the formats? A landscape format radiates more stability through its shape. A flat house looks more stable to us than a high-rise building. Thus, a portrait format image appears more dynamic. So the choice of the two formats can support or contrast the main subject.
9. use opposing shapes for contrast
Contrasts can be created in many ways. Certain patterns of perception date back to a time when man lived in nature in very simple dwellings. In the forest, a rectangular dwelling immediately catches our eye. This was important at that time in order to perceive enemies earlier.
Shapes are perceived very specifically by the observer. The basic shapes:
- Circle
- Rectangle
- Triangle
Often these shapes appear in our pictures unconsciously. Similar to formats, these shapes create different associations. A triangle standing on its apex seems more unstable than one with the apex pointing upwards.
A circle appears very harmonious, while a rectangle standing on its long side can radiate immobility or even security.
At the beginning of viewing a picture, the eye perceives all elements only as areas. It recognizes details only afterwards.
The hack: To make yourself aware of this effect, you can squint your eyes so that you are only looking through your eyelashes. This blurs your vision and you only perceive the basic shapes. In this way, you can begin to imagine what the viewer will perceive first.
Shapes can not only stand for themselves, but in combination they can also create contrast. Imagine the calm and harmony of a circle against the instability of a triangle standing on its tip.
This consideration can be used very effectively in conjunction with the repetitions from point 6.
10. use contrasts purposefully as a starting point
Point number 10 is experienced even more consciously in black-and-white photography than in color photography. Because there you have no possibilities to control the attention with colors. All you have are different brightnesses. So black and white photography means a bit more of a challenge. But the perception of brightness can also be observed in color images.
Did you know that the first place the viewer looks in the image is where the strongest contrast is?
Knowing this, this perception can be used incredibly effectively as a starting point for image viewing. In many cases, the difference in brightness signifies contrast. However, as described above, color or shape contrasts can also provide the initial attention.
Landscape photographers like to use a subject in the foreground that is relatively bright and stands out from the background. This is a deliberate use of strong contrast. At this point, the viewer can enter the image. The visual journey through the photo can begin from this point.
Summary
Below, once again, the 10 points as a summary:
- Do not center the main subject
- Keep the image simple and fill it in deliberately
- Limit yourself to 2-3 main colors
- Use more wide angle for greater depth in the image
- Move closer for more three-dimensionality
- Use repetition for eye tracking
- Use tapered lines for more depth
- Consciously use portrait and landscape formats
- Use contrasting shapes for contrast
- Use contrast purposefully as a starting point
Bonus: Download a summary
If you want to remember the short version of the tips more often, I have built a pdf file to print out:
10 tips for better image composition (PDF, 0.2 MB)
Practice makes perfect: Tasks for image composition
When I teach image composition and image design to the participants in my workshops, they of course have to practice in addition to the theory part. For this I go with them into the city and set them tasks. For each task there is a time window of 10 minutes to solve the task. These tasks go a bit beyond the tips.
The tasks
Photograph
- Incoming lines
- A strong contrast
- From an unusual perspective
- A contrast of shapes
- A color contrast
- A curved line
- An S-curve
- A repetition of elements
- One group of elements
- Two groups of elements
- Two complementary colors
- A combination of three of the previous tasks
These tasks are very abstract at first sight. Their purpose is to train your perception of these elements. This will help you to use these elements more consciously in the future to create better image compositions.
My recommendation: Take 2 hours on a quiet Sunday morning, go out with your camera and do these exercises yourself. I can guarantee that your perception and photography will improve as a result.
Further information on image composition
I highly recommend a book when it comes to learning or improving image composition. The Photographic Eye by Michael Freeman covers all aspects of this topic very well:
If you want to learn even more about image composition, these links may help:
- 21 Ways to Improve Your Photography
- Wikipedia article on image composition
- Great series of articles by Frank Tegtmeyer
- There is also an exciting video about it on YouTube:
Finally, a technical tip. Some photographers find it easier to compose images when they look through the viewfinder instead of at the display. That’s why I highlighted such cameras in my two articles for best compact camera and best system camera.